A NAS is not only good for storing data and media, you can also use consumer-webcams per USB. And that´s all you need for video monitoring with motion detection. The tutorial is based on the QNAP TS-212 (the best there is), but it should be the same for all QNAP devices. In fact, it should work on pretty much every linux distribution.
Not every webcam is compatible, a correctly detected device will show up in the system log of your QNAP Software: “System Administration” > “System Logs”.
Optware
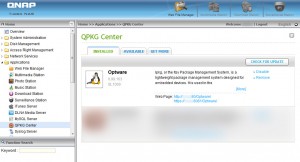
First you have to install “Optware” with the package manager. It´s another package system with support for additional Linux Software:
Motion
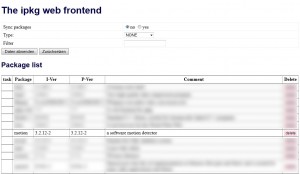
Install “motion” through the Optware interface, that´s a package for motion detection. It´s a good idea to install the text editor “Nano” too:
SSH / Putty
You have to activate SSH now, this can be done via “Network Services” and “Telnet /SSH”. After that, you can access the NAS from your Windows computer with “Putty” or any other SSH Client. You just have to fill in the host name or IP address of your NAS and login with your usual data. Open the settings file of “motion” in Nano:
nano /opt/etc/motion.conf
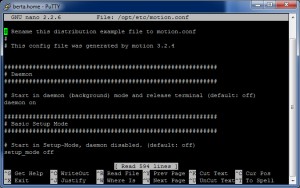
The file is pretty big, but well commented. Important settings are “framerate” (pictures per second), “width/height” (resolution), “treshold” (sensibility), “quality” (JPEG quality), “target_dir” (target directory), “jpeg_filename” (output filename). You should check the processor load if you change the settings, motion needs 5-10% of the processor with 2 frames per second and a resolution of 640×480 (QNAP TS-212). Keep in mind that it has to check for changes in front of the camera the whole time. But still, the QNAP “Turbo Station” 212 offers enough power to stream HD videos with DLNA while motion is running.
You can also use “motion” to output a video file (parameter “ffmpeg_cap_new” and some more), and you can set up a Streaming Server. I highly suggest browsing through the whole config file, it´s worth it.
After editing the config file, save it in Nano with “CTRL+O” close Nano with “CTRL+X“. Now you can start motion with the following command:
/opt/etc/init.d/S99motion
Important: After restarting the QNAP station, you have to restart “motion” too. If you want it to run on startup, just google for “Startup Patch” with Google.
An easy way to start and stop motion is with a Windows Batch file:
plink.exe -ssh -load [hostname/ip] -l [username] -pw [passwort]
    /opt/etc/init.d/S99motion start
plink.exe -ssh -load [hostname/ip] -l [username] -pw [passwort]
    killall -9 motion
Remote Replication
You want to upload the images created by motion to a Server with FTP? No problem with the QNAP station. The magical word is “Remote Replication” and already included in the QNAP Software:
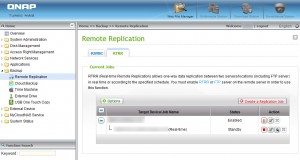
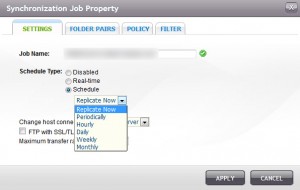
Start an extensive wizard with “Create a Replication Job”, it should be straightforward. You can choose between scheduled replication and real-time:
If you want to view your images, just create a (PHP) script on your remote FTP Server or use the QNAP with the integreated Webserver (with PHP and MySQL, which is all you need). Even getting access to your script from the outside is not a problem, use a DDNS-Service like “no-ip.com“. Most providers don´t offer static IP addresses, so you will most likely need it. After registration on the Website put in the login data in the QNAP Software:
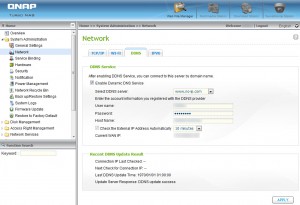
…and you got yourself a (more or less) static domain for accessing your NAS. Of course it only works if you use “Port Forwarding” on your Router and activate the NAS Webserver…